BACF files are created separately for input or output parameters.
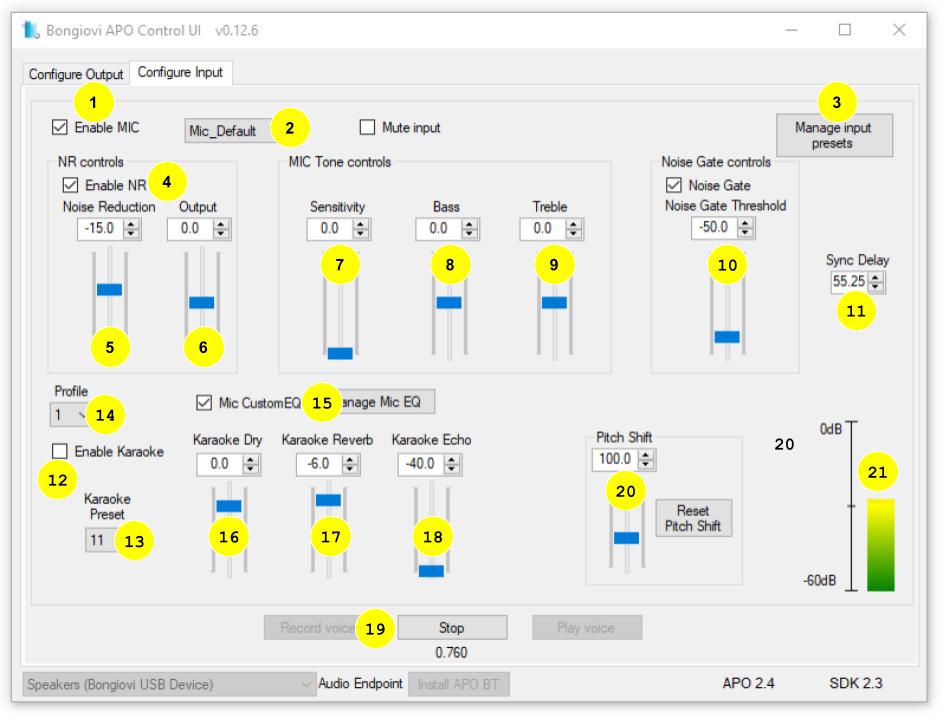
Enable the Noise Reduction algorithm. This algorithm works by removing all possible noise to leave only the speaking voice. This signal is blended with the original signal to create the desired effect.
Adjust the noise reduction amount. This control mixes the original signal (no noise reduction) with the noise-reduced signal.
When the control is at maximum (0dB) only the original signal is heard.
Lowering the “Noise Reduction” slider allows more of the noise-reduced signal to be heard.
At the lowest position (-60dB), only the noise-reduced signal is heard.
Adjust the level of the noise-reduced signal. This control is used only for calibration.
Sensitivity adjusts the amount of dynamic range control (compression) applied to the signal. Boosting this control will make the voice louder and more compressed.
Adjusts the bass tone of the input signal.
Adjusts the treble tone of the input signal.
Set the noise gate to remove low-level noise from the input signal.
The gate will close (reduce the input signal -20dB) when the input signal drops below the threshold.
If the noise gate threshold is set to a higher value, the input signal must be louder to open the gate.
This delay is used on the original signal to synchronize it with the noise reduction signal. 55.2ms is a good value for most devices.
Enable karaoke reverb and echo effects.
Select one of the built-in karaoke presets.
Smooth Ballad
Springs
Small Room
Echo Plate
Mama Robot
Epic Cave
Baby Robot
Daddy Robot
Ambient Slap
Dark Hallway
Small Temple
Long Echo
Short Echo
Medium Echo
Select a build-in profile best suited for your product’s microphone.
Open the 10 band graphic EQ controls.
Adjust the level of the dry (original) input signal.
Adjust the level of the reverb signal.
Adjust the level of the repeating echo signal.
This control uses feedback to create the repeating echo. As the level is increased, the echo will repeat longer.
Record a sample of the input signal, then play it back to hear the current effects. This allows the user to calibrate their microphone settings.
Up to 15 seconds may be recorded.
The recorded selection will loop until the user stops playback.
While the recording is playing, Input controls may be adjusted.