- Install VB Cable virtual audio driver
- Be sure the sample rate for the VB Cable driver is set the same for both Playback and Recording. It is best to choose a high sample rate that is native to your hardware devices. For example, if your microphone only supports 16kHz and your output device only supports 48kHz, set the virtual audio driver to 48kHz.
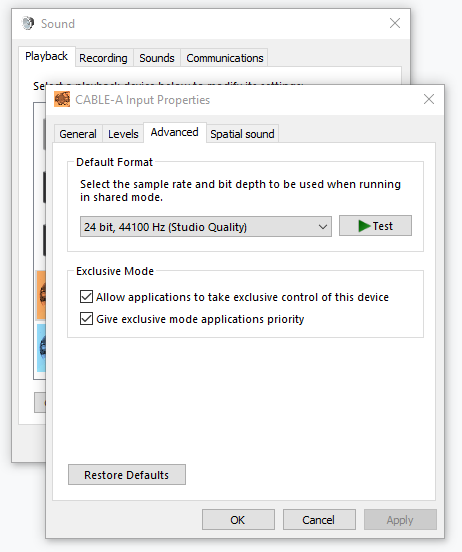
- For Playback, set this in the Windows sound control panel → Playback tab → Cable Input → Properties → Advanced tab → Default Format:
- For Recording, set the same sample rate in Windows sound control panel → Recording tab → Cable Output → Properties → Advanced tab → Default Format:
- For Playback, set this in the Windows sound control panel → Playback tab → Cable Input → Properties → Advanced tab → Default Format:
- The virtual audio driver may now be used for input or output:

- If you are testing the BongioviNR app using pre-recorded media, set the virtual audio driver as your default output device by clicking on the speaker icon in your Windows system tray:
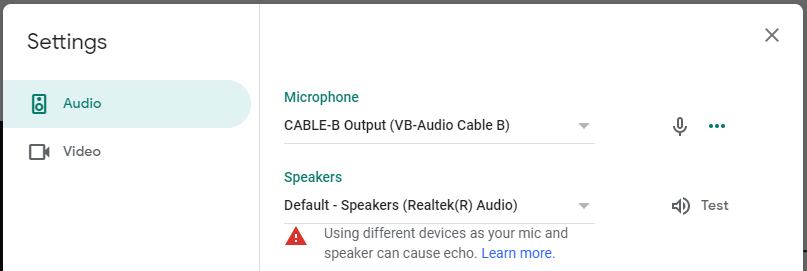
- If you are using BongioviNR for real-time microphone processing (VoIP, video chat, etc) set the virtual audio driver as your microphone source in the chat application:

NOTE: Most chat applications have good echo cancellation algorithms that work well with the BongioviNR evaluation app. However, there is a chance echo may be heard by some participants depending on their endpoint configuration.