- Be sure a Virtual Audio Driver is installed on your PC.
- Launch DPS Profile Creator 2.0

- Click the Lock icon at the top left of the Main Window. Activate the application using the License Key provided by your Bongiovi agent. The lock icon will disappear when successfully activated.
- Click the SETTINGS tab.
- Choose Local SDK Emulation in the connection menu:

- Click the checkbox to initiate the connection:

- NOTE: The connection must be initiated to save the audio settings to your preference file.
- Click the Audio Settings button.
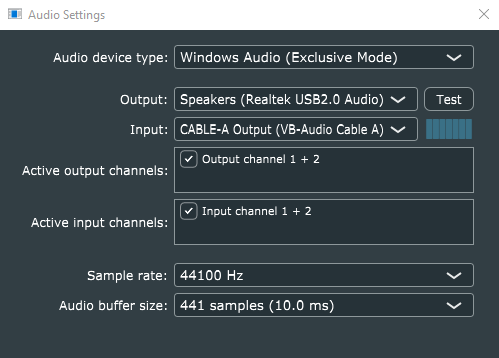
- Set audio settings as shown below. The virtual audio driver is set to input and your audio hardware device is set to output:

- For best stability, set the input device first, then the output device.
- There are various Audio device types to choose from. Exclusive mode is most stable on a large number of devices. Larger audio buffer sizes may be required for the other modes.
- This is the signal path inside your PC…
 The Virtual Audio Driver is set as the default playback device in your PC’s sound settings so sound from all apps is captured for processing.
- Close the Audio Settings window.
- Click the ROUTING tab.
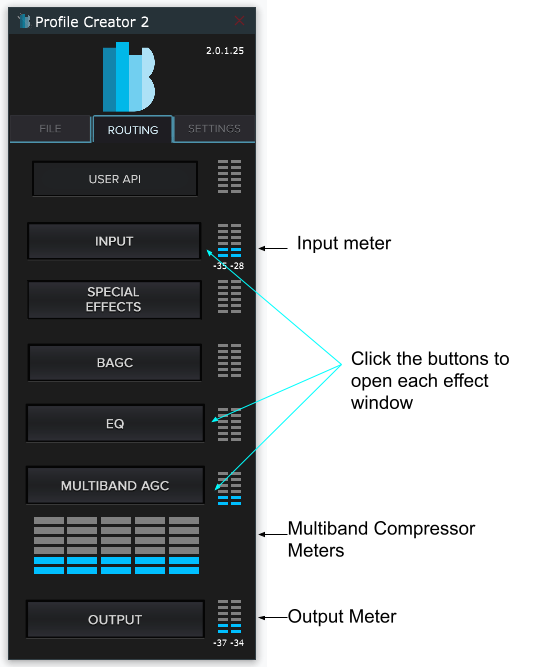
- Play music from Windows Media Player or any other sound application. You should see the audio meters moving in the PC2 Main Window while hearing sound from your output device.

- Click the FILE tab.
- Click Load to load a BGPS profile set delivered by your Bongiovi agent.
- If you are using version 2.0.4 or higher, open the Preset Manager window to load various presets within the BGPS file.
- Click back to the ROUTING tab.
- Click the USER API button.
- Adjust the User Volume control. You should hear the volume change on your audio device.