This project is set up for the Keil ARM IDE version 4 using the Nuvoton NUC505 Board Support Package (BSP) version 3.00.002. The Bongiovi DPS Keil project must be placed into the proper folder in the bsp:
- NUC505 Evaluation Board <– Root folder of the BSP
- Document <– Full documentation for the BSP is in here.
- Library
- Third Party
- Sample Code
- BootTemplate
- CortexM4
- FreeRTOS
- Hard_Fault_Sample
- Semihost
- Template
- StdDriver <– The Bongiovi SDK project folder is placed here.
- I2S_InternalCODEC_DMA5 Bongiovi DPS vx.x.x
- This is the Bogniovi SDK project folder.
- Place indices.c file here.
- This folder also includes DPSlib, nuc505_isr.c and main.c.
- KEIL
- I2S_InternalCODEC_DMA5_DEVBoard.uvproj project file is here. Double-click the .uvproj file to launch Keil and open the Bongiovi DPS SDK project.
- obj
- The compiled I2S_InternalCODEC_DMA5_DEVBoard.bin file is generated here. This is the file that will be flashed into the NUC505 using the Nu-Link ICP programming tool.
Legacy EVB Setup
Flashing the Legacy EVB
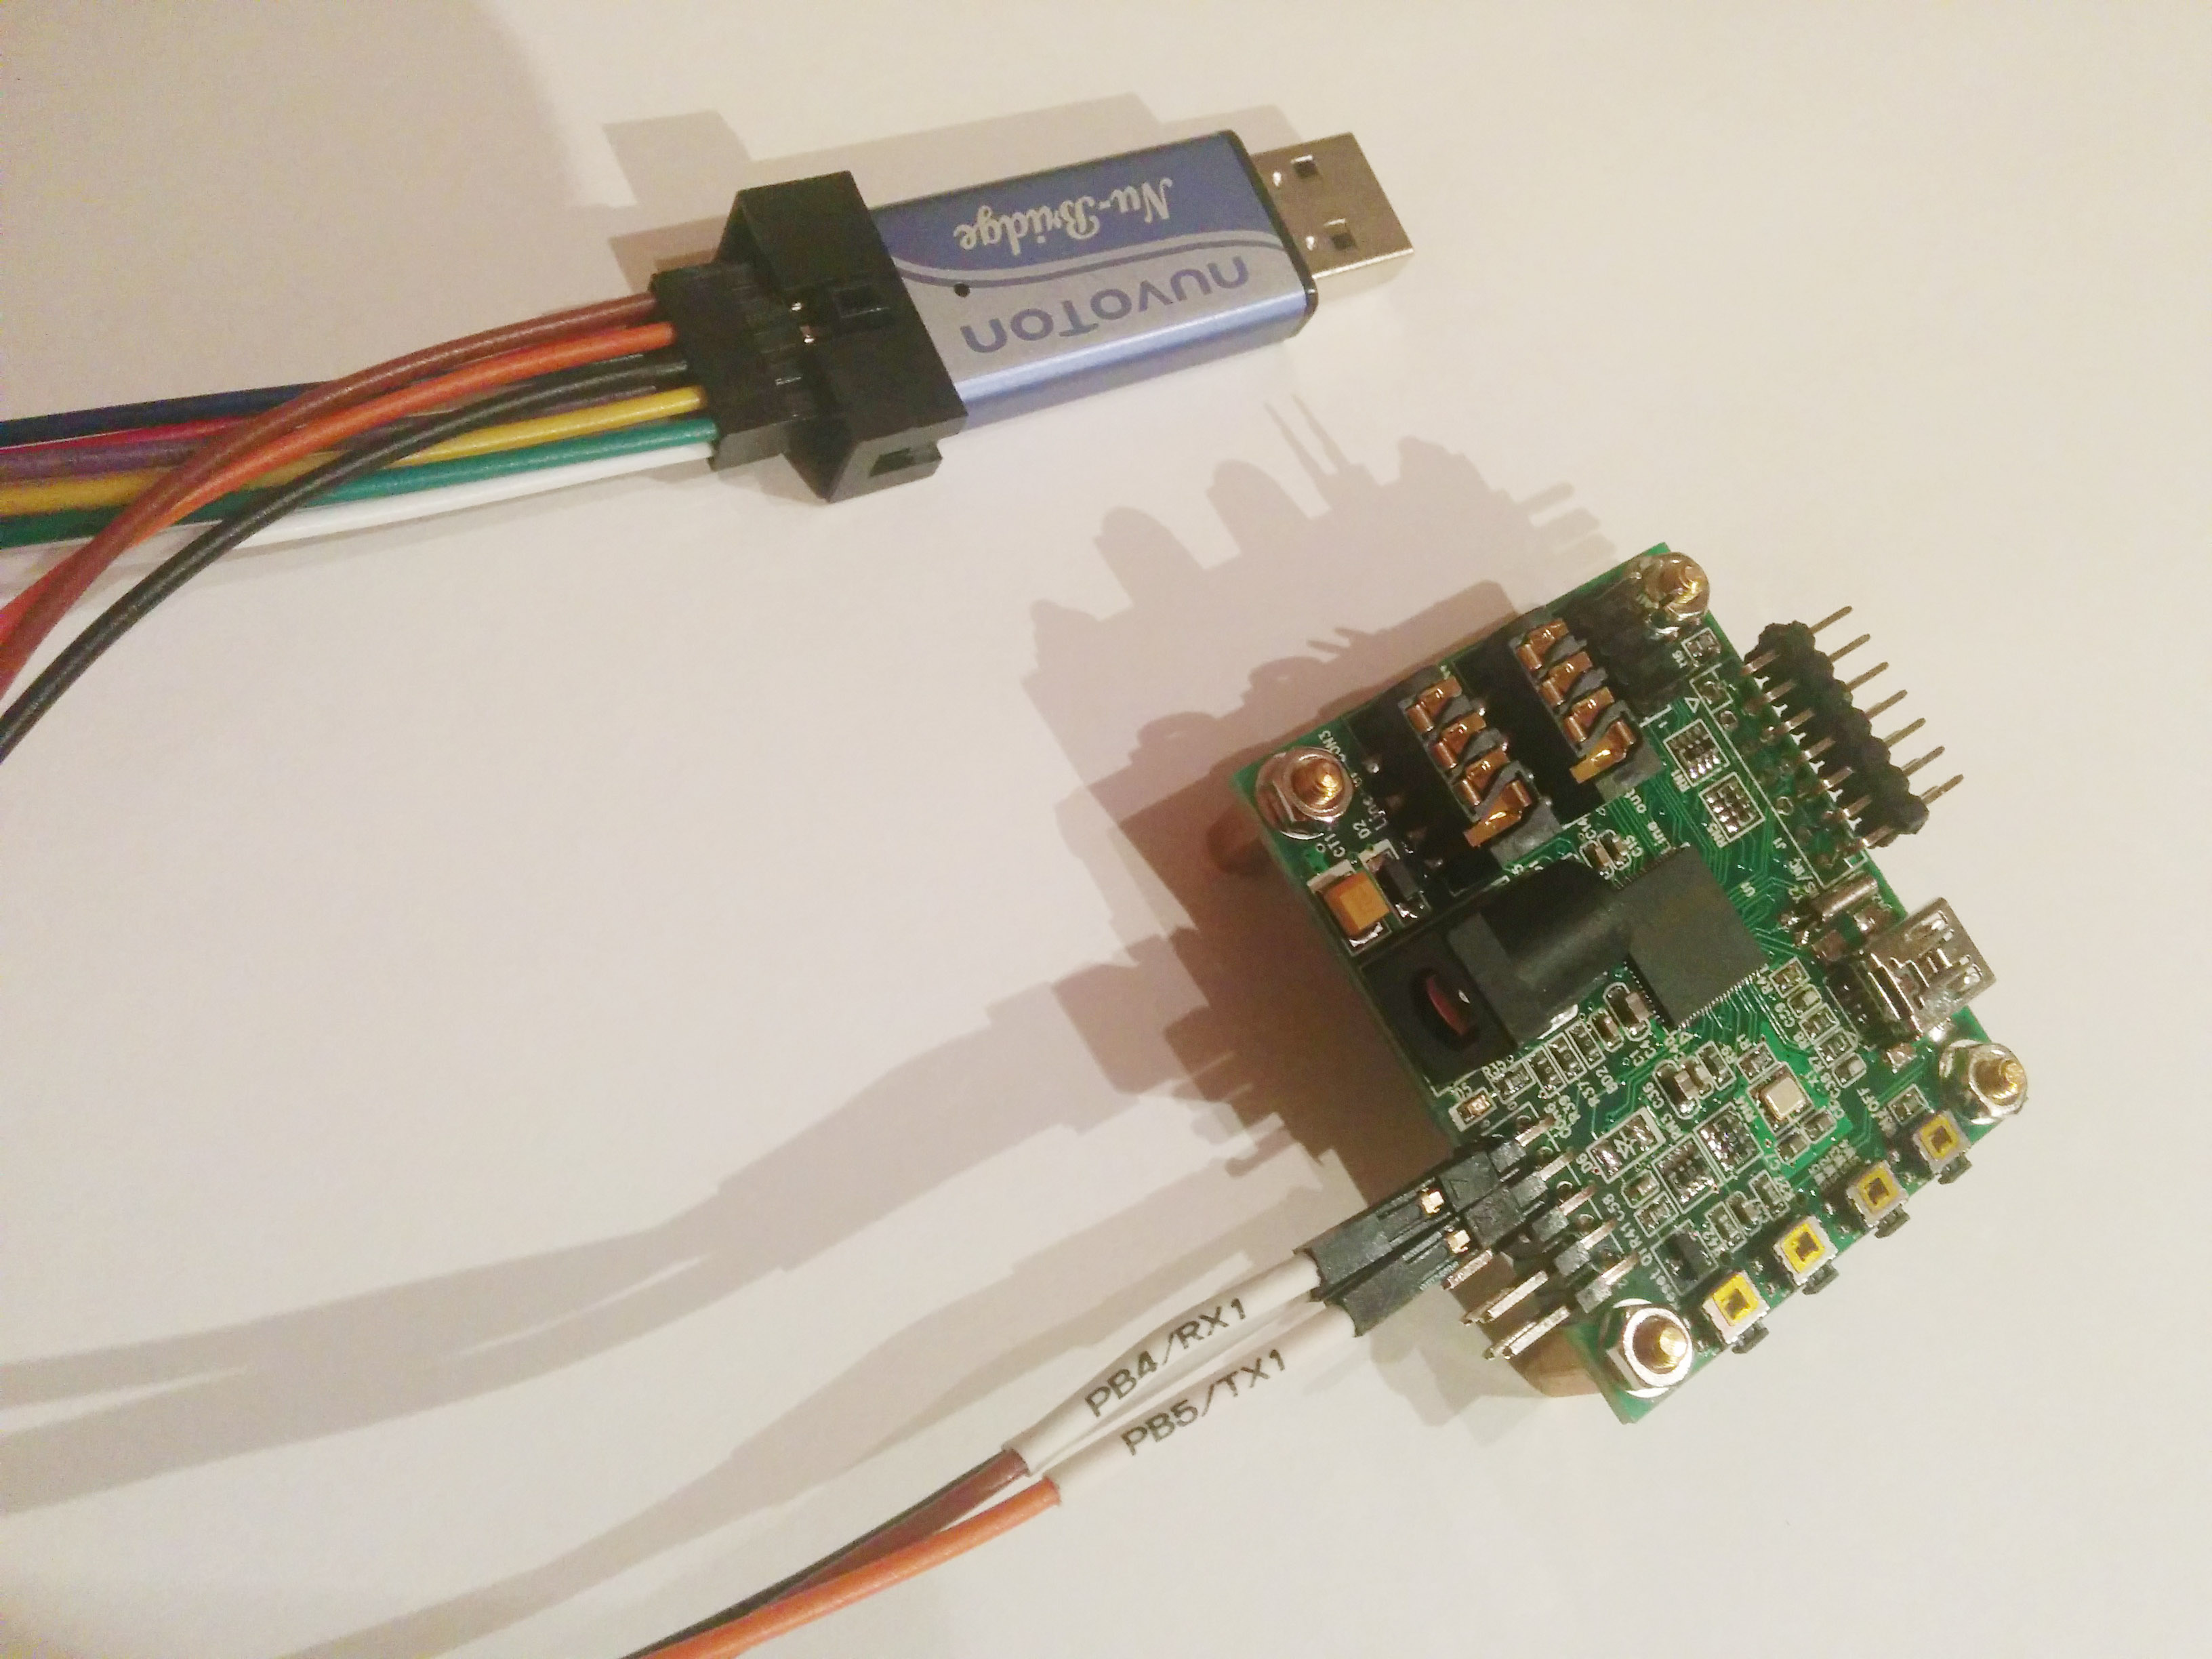
- Connect the Nu-Link ICP Programming Tool to your computer’s USB port.
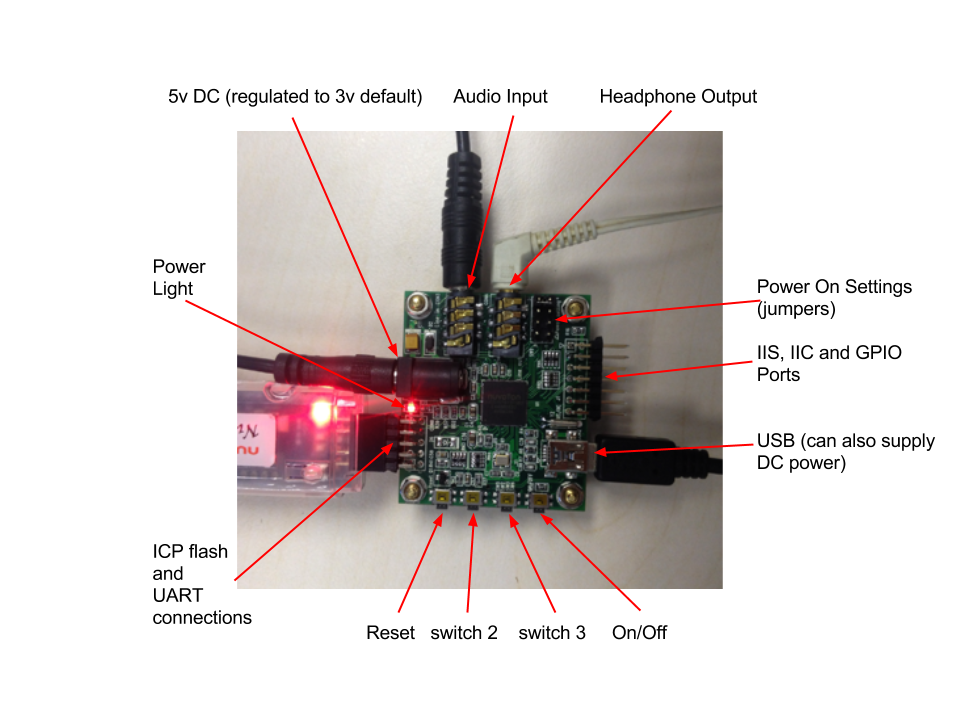
- Connect the NUC505 Audio Board to the Nu-Link via Connector 6.
- Set the jumper on the Audio Board to ICP programming mode as shown in the picture.
- Turn on the Audio Board by pressing the on/off button.
- The Nu-Link tool should supply power to the Audio Board. If enough current is not available on your USB port, connect DC power to the Audio Board.
- Click the Flash menu in Keil.
- Click Download.
- If this is the first time flashing, you may be prompted to update the firmware of the Nu-Link. Follow the instructions for updating the firmware. Updating the firmware of the Nu-Link is stable and will not harm the Nu-Link.
- After updating the firmware, you will have to click Flash/Download again.
- If connection is successful, you will see a blue progress bar at the bottom of the Keil window. The .bin file will be flashed into the NUC505.
- Disconnect Audio Board from the Nu-Link tool.
- Remove the jumper from the Audio Board.
- Connect audio and serial to the Audio Board to verify your changes.
